Swagger文档
更新: 1/16/2025 字数: 0 字 时长: 0 分钟
概述
现在的开发模式基本上都是前后端分离的模式,后端提供API接口给前端调用,那么API文档成了前后端开发人员联系的纽带。
OpenAPI是一个编写API文档的规范,然而如果手动去编写OpenAPI规范的文档,是非常麻烦的。而Swagger就是一个实现了OpenAPI规范的工具集。
Swagger-UI是一个用于可视化展示 Swagger/OpenAPI 规范文档的工具。它将定义好的 API 接口信息(如接口路径、请求方法、请求参数、响应内容等)以直观的用户界面形式呈现。开发人员、测试人员或者其他相关人员可以通过浏览器访问 Swagger-UI 界面,方便地查看和理解 API 的功能和使用方法,并且能够直接在界面上进行 API 调用测试,有助于提高 API 开发过程中的沟通效率、加快开发和测试进度,是 API 文档展示和交互测试的实用工具。 
使用
本项目模板使用@nestjs/swagger包实现了自动生成Swagger-UI文档的功能。
在main.ts中引入并初始化swagger模块:
import { NestFactory } from '@nestjs/core';
import { RootModule } from './root.module';
import { SwaggerModule, DocumentBuilder } from '@nestjs/swagger';
async function bootstrap() {
const app = await NestFactory.create(RootModule);
// ...
// Swagger 配置
const config = new DocumentBuilder()
.setTitle(configService.get('app.name', 'NestJS API'))
.setDescription(configService.get('app.description', 'NestJS 启动模板 API 文档'))
.setVersion(configService.get('app.version', '1.0.0'))
.addBearerAuth(
{
type: 'http',
scheme: 'bearer',
bearerFormat: 'JWT',
name: 'JWT',
description: 'Enter JWT token',
in: 'header',
},
'JWT-auth', // This name here is important for matching up with @ApiBearerAuth() in your controller!
)
.build();
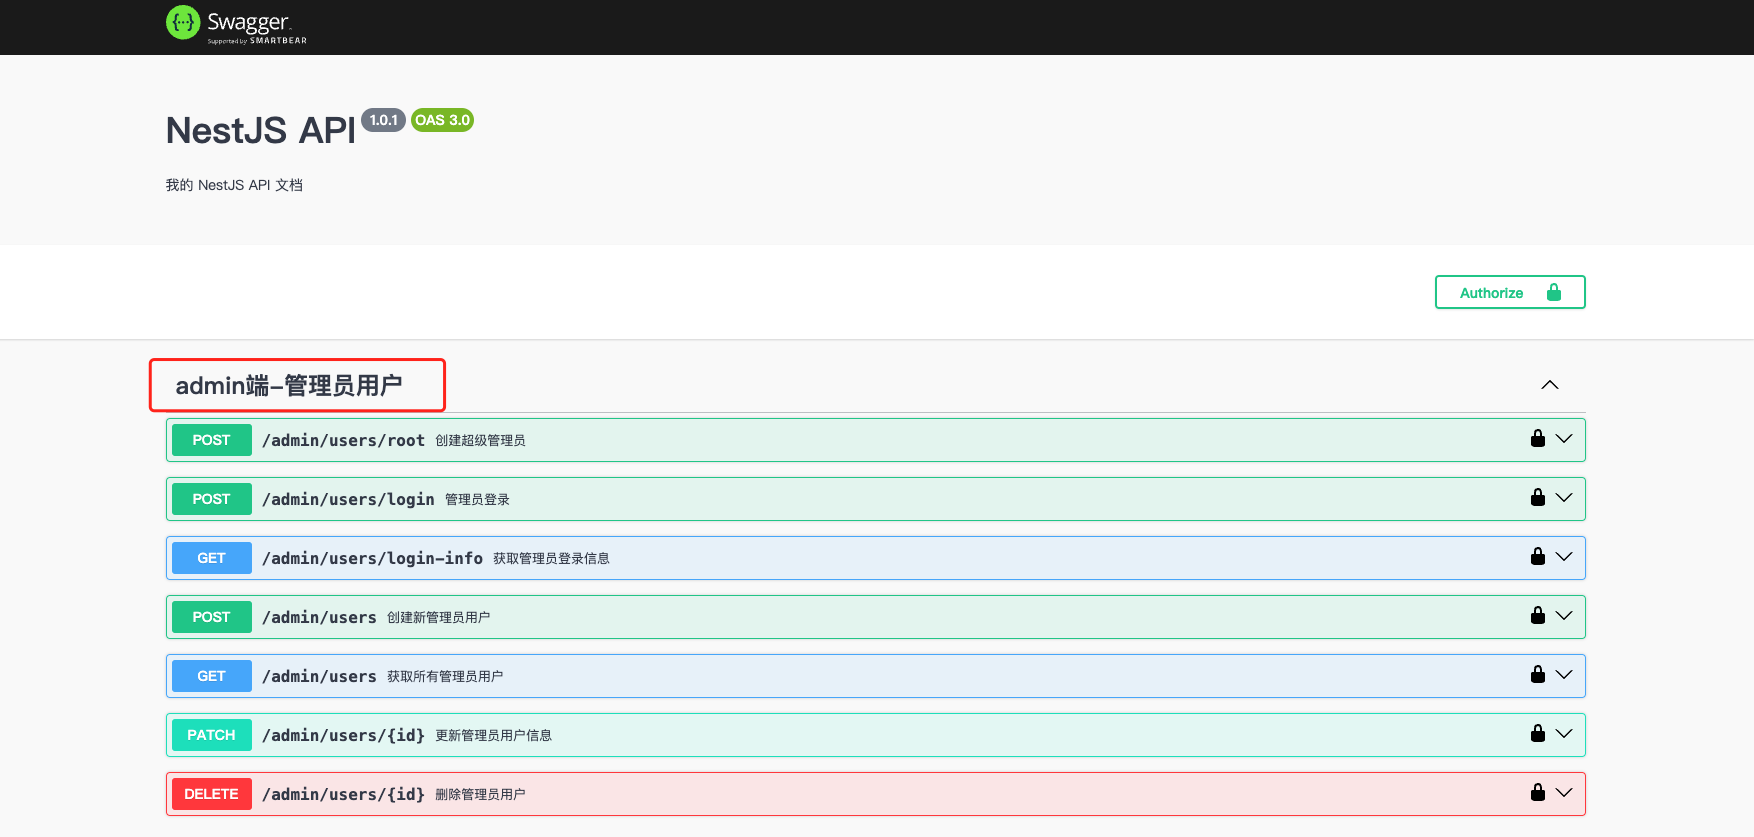
在项目启动后,访问localhost:3000/swagger即可打开Swagger-UI页面。
标注
要生成Swagger-UI的文档,需要我们在书写代码时,对关键部分代码进行标注,以便让Swagger-UI知道提取哪些信息用于生成API文档。
一般情况下,书写一个API接口,我们需要知道如下信息:
请求地址例如:/app/users请求方法例如:GET请求参数例如:?page=1&pageSize=10响应类型例如:{ "data":"....", "code":0, "message":"请求成功" }接口描述例如:获取用户列表- 更多其他辅助信息,非必须,本文暂不涉及,有需要的自行扩展研究
在本项目模板中使用@nestjs/swagger包进行生成Swagger-UI,所有的标注都是通过@nestjs/swagger提供的多种装饰器来进行:
@ApiTags
@ApiTags标记在Controller上,表示当前Controller下的所有接口归为一个分组,分组名称为参数传入的字符串。
import { ApiTags } from '@nestjs/swagger';
@ApiTags('admin端-管理员用户')
export class AdminUsersController {
    //...
}
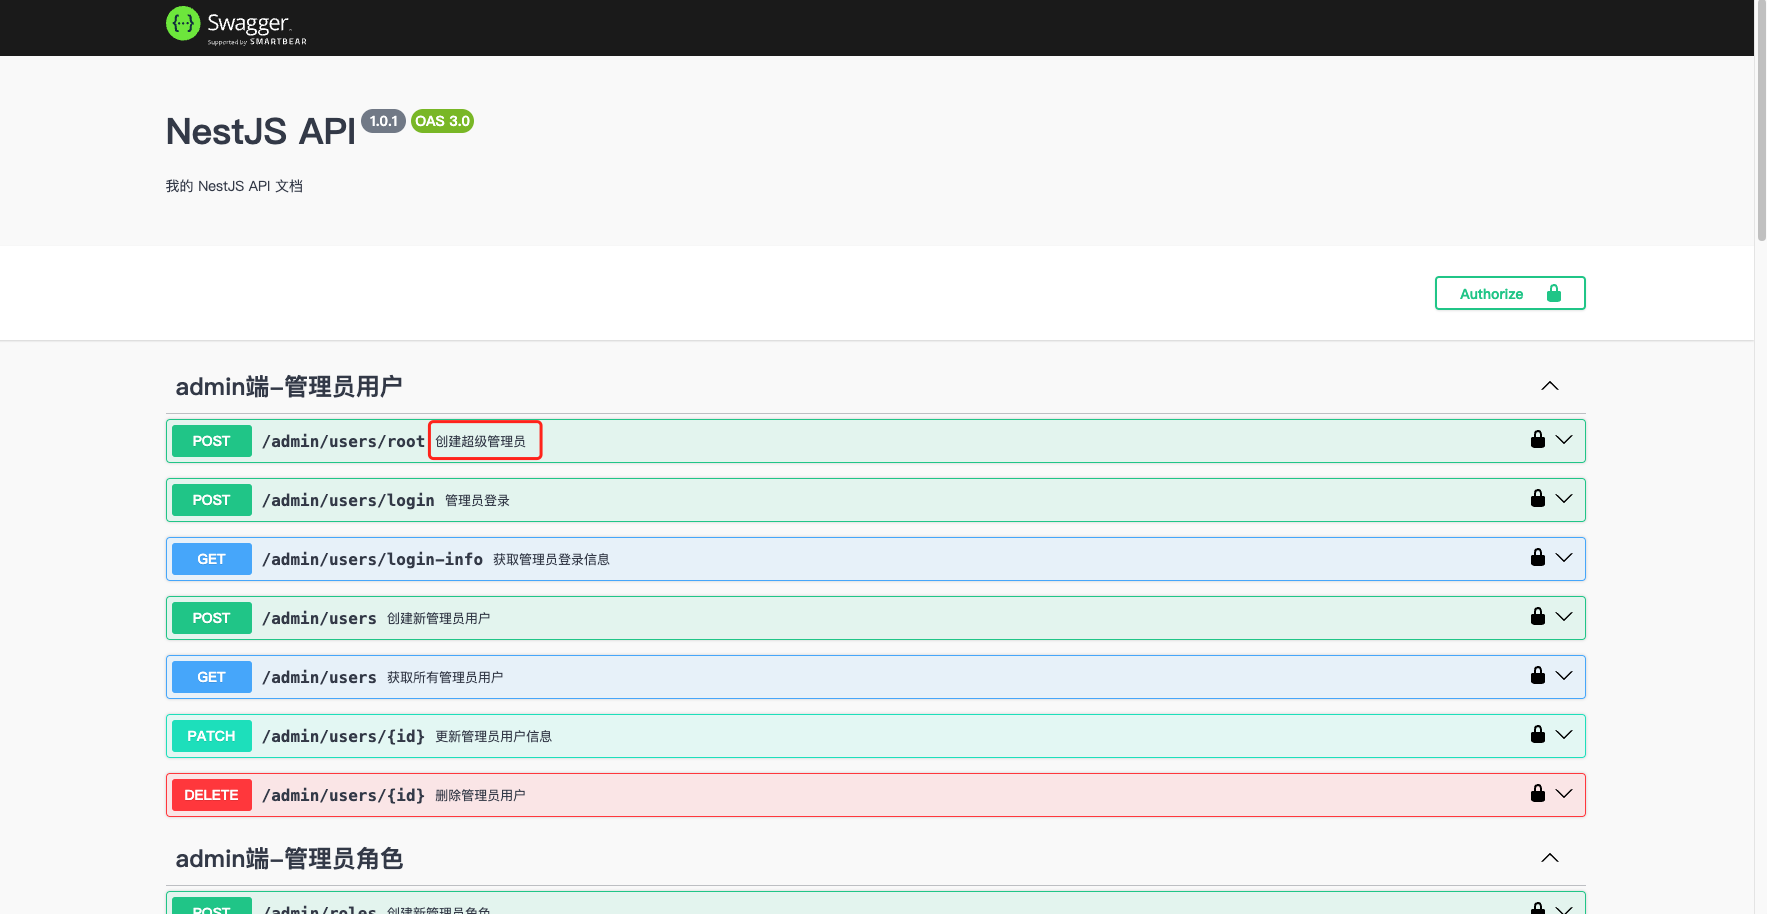
@ApiOperation
@ApiOperation标记在Controller的方法上,用于描述当前API接口的信息。 @ApiOperation的参数是一个对象,常用的属性有:
summary: 接口的简要描述description: 接口的详细描述deprecated: 是否废弃tags: 标签分组
示例:
import { ApiOperation } from '@nestjs/swagger';
// ...
@ApiTags('admin端-管理员用户')
export class AdminUsersController {
    // ...
    @Post('root')
	@ApiOperation({ summary: '创建超级管理员' })
	@CustomApiResponse({
		type: String,
		example: "ok",
		description: "超级管理员创建成功",
	})
	createRoot() {
		return this.adminUsersService.createRoot();
	}
    // ...
}
TIP
建议为每个API接口都添加@ApiOperation装饰器,并填写恰当的描述信息,这对于团队协作和接口维护都很有帮助。
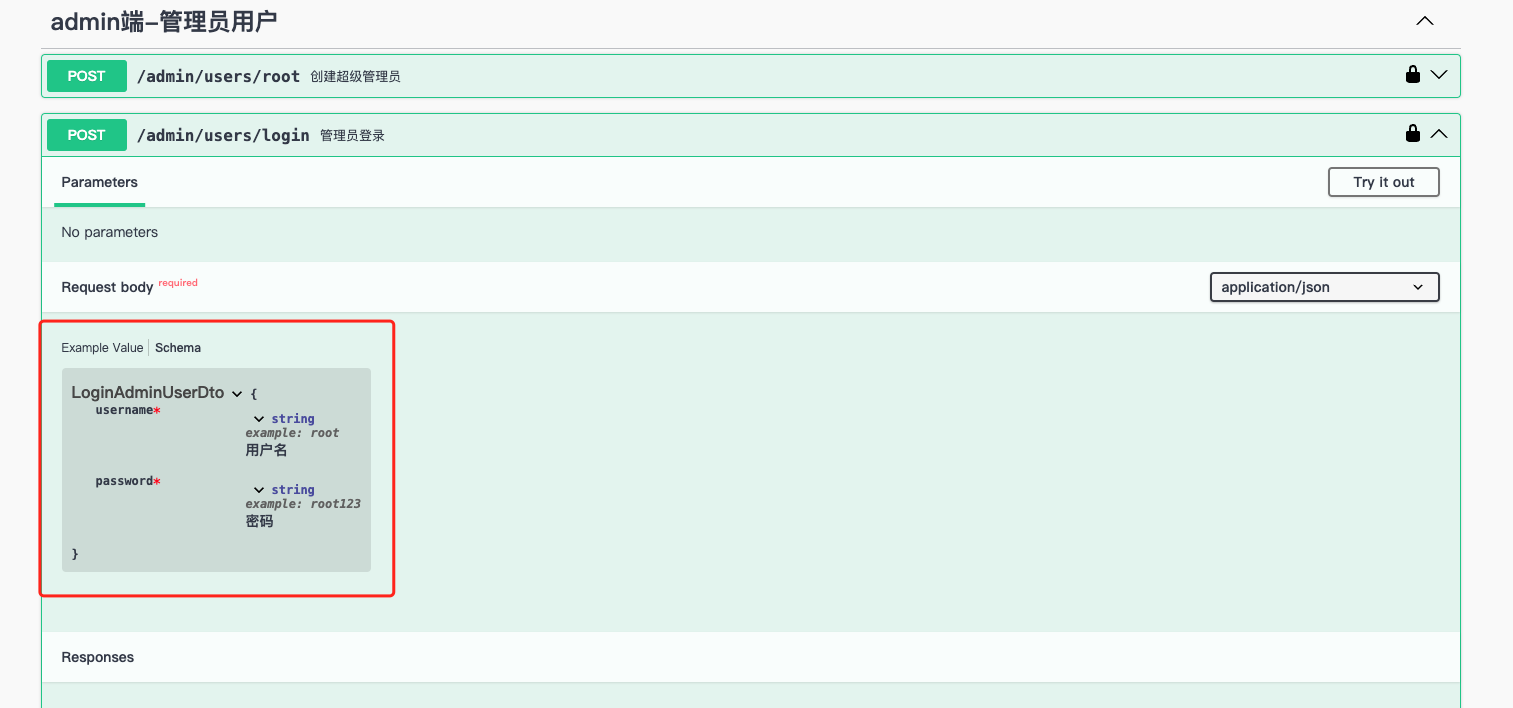
@ApiProperty
@ApiProperty装饰器用于在DTO(数据传输对象)或实体类中标注属性的类型和描述信息。它帮助Swagger理解API请求和响应的数据结构。
常用属性说明:
description: 属性的描述信息example: 示例值required: 是否必填,默认truetype: 属性类型enum: 枚举值default: 默认值minimum/maximum: 数值范围isArray: 是否为数组
示例:
import { ApiProperty } from '@nestjs/swagger';
export class LoginAdminUserDto {
    @ApiProperty({ description: '用户名', example: 'root',type:String })
    username: string;

    @ApiProperty({ description: '密码', example: 'root123',type:String })
    password: string;
}
TIP
确保为DTO中的每个属性都添加 @ApiProperty 装饰器,这样可以让API文档更加清晰完整,前端开发人员也能更好地理解数据结构。
@ApiResponse
@ApiResponse装饰器用于描述API接口的响应信息。它可以定义不同HTTP状态码下的响应结构。
主要参数说明:
status: HTTP状态码description: 响应描述type: 响应数据类型schema: 自定义响应结构
示例:
@ApiResponse({
  status: 200,
  description: '请求成功',
  type: UserEntity
})
@ApiResponse({
  status: 403,
  description: '没有权限'
})
async findOne(): Promise<UserEntity> {
  // ...
}考虑到我们在统一响应结构中已经实现了统一的响应格式封装,如果继续使用@ApiResponse来标记每个接口的响应结构,会导致大量重复的响应结构声明。为了简化这个过程并保持响应文档的一致性,我们封装了@CustomApiResponse装饰器。
@CustomApiResponse
@CustomApiResponse是本项目封装的一个自定义响应装饰器,用于统一处理API响应格式。它会自动包装标准的响应结构:
{
  data: T, // 实际响应数据
  code: number, // 业务状态码
  message: string // 响应消息
}主要参数说明:
type: 响应数据类型example: 示例数据description: 响应描述isList: 是否为列表类型isPage: 是否为分页类型
基础用法示例:
@CustomApiResponse({
  type: String,
  example: "success",
  description: "创建成功"
})
async create() {
  return "success";
}列表响应示例:
@CustomApiResponse({
  type: UserEntity,
  isList: true,
  description: "用户列表"
})
async findAll() {
  return [/* user list */];
}分页响应示例:
@CustomApiResponse({
  type: UserEntity,
  isPage: true,
  description: "分页用户列表"
})
async findPage() {
  return {
    list: [/* user list */],
    total: 100,
    page: 1,
    pageSize: 10
  };
}
TIP
- 推荐使用
@CustomApiResponse来统一API响应格式 - 根据实际返回数据结构选择合适的参数配置
- 建议都添加
description描述,提高文档可读性 @CustomApiResponse源码位于src/common/decorators/api-response.decorator.ts- 更多
@CustomApiResponse的实际使用示例,请参考src/endpoints/admin/admin-users/admin-users.controller.ts
总结
本文介绍了项目中最常用的几个Swagger装饰器及其使用方法:
@ApiTags- 用于API分组@ApiOperation- 描述API接口信息@ApiProperty- 标注DTO属性@CustomApiResponse- 统一响应结构
需要特别注意的是:
@ApiProperty是使用频率最高的装饰器,建议耐心的为每个DTO中的属性都定义精准的类型和添加详细的描述信息,因为如果你打算搭配使用N-Full-Kit的前端项目模板(admin前端、小程序、app、桌面客户端等等),这些项目模板会使用工具自动从swagger文档中生成对应的前端请求代码,而代码中关于参数类型和注释描述的部分就来源于@ApiProperty的信息标注,它将影响所有前端项目的开发效率和开发体验,点击查看前端生成请求代码。即便不使用N-Full-Kit的前端项目模板,编写一个严谨而完整文档也是一个好的习惯。- 使用
@CustomApiResponse可以确保API文档的响应结构与实际响应保持一致 - 编写API文档时应当站在调用方的角度,提供清晰、准确的接口说明
@nestjs/swagger还提供了更多实用的装饰器,如:
@ApiParam- 路径参数说明@ApiQuery- 查询参数说明@ApiHeader- 请求头说明@ApiBody- 请求体说明
更多高级用法请参考: